Step 8
We run the corresponding simulation and observe the behavior:
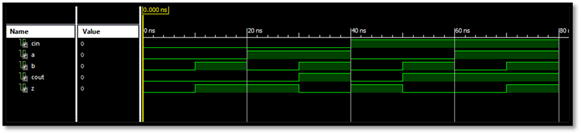
Step 9
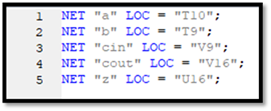
We can conclude that the behavior is as expected and we can start to program the pins of our card. For this you have to create a file called Implementation Constraints File. Investigating more about the Nexys3 we can obtain input and output pins:
Step 10
Then we generate the corresponding files for the test with the card and wait the confirmation hooks to proceed to implement it on the card:
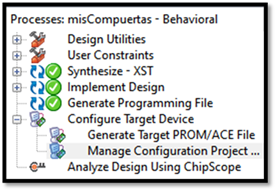
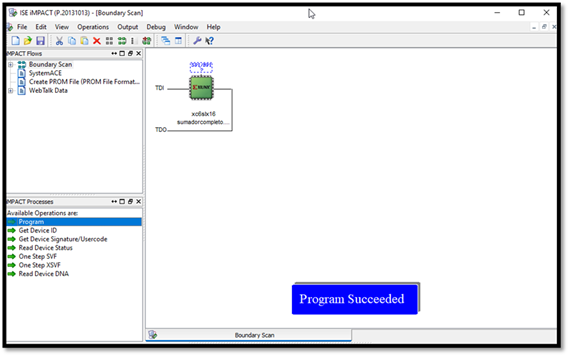
Step 11
We generate the configuration screen by clicking on “Manage Configuration Project” and a screen appears where we must look for our card, once found it will We click on "Program" and wait for the code to be installed on the card:
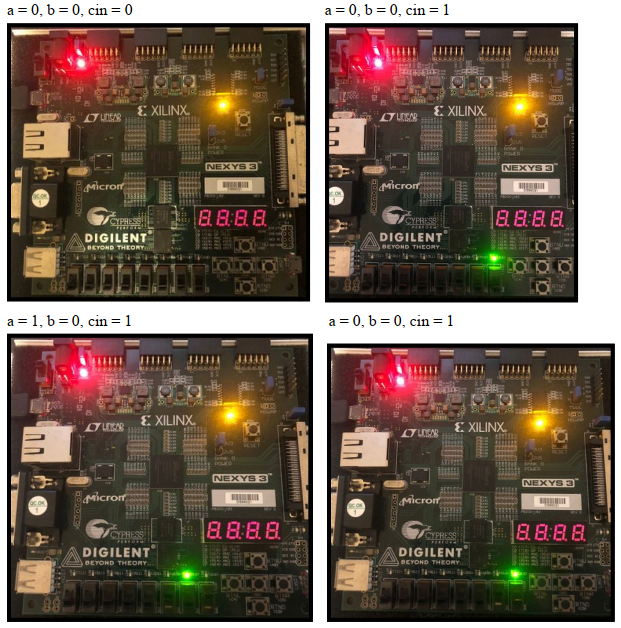
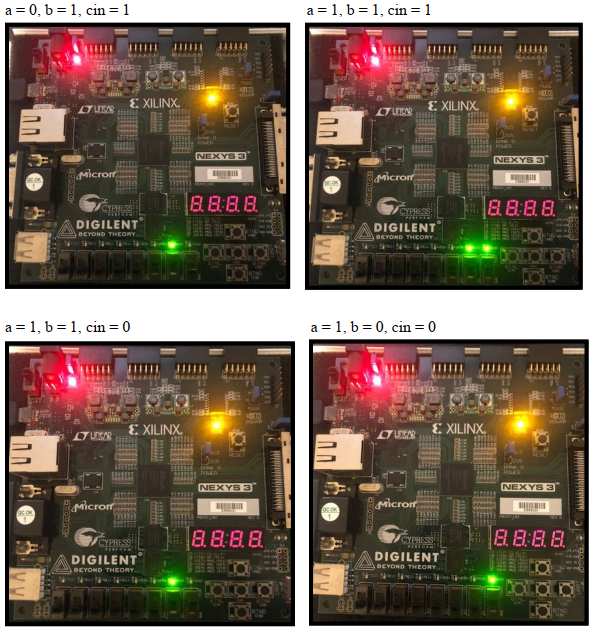
Step 12
We proceed to do the tests on the card to successfully conclude our project: